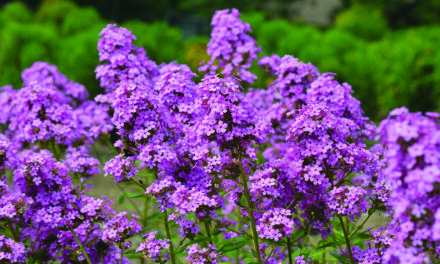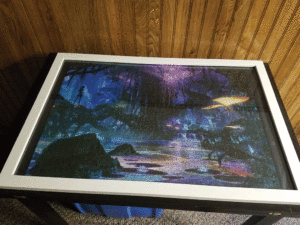
When mounting a finished puzzle, choose a frame size that matches your home décor to create a consistent look. Leave about 2 1/2 to 3 inches on each size to help focus the eyes on the artwork. (Photo courtesy Kendra Nelson)
Before the coronovirus outbreak, boxes of jigsaw puzzles were gathering dust on shelves and in closets.
Short of a family gathering, holiday or hurricane, folks were far too time-challenged to partake of the slow steady satisfaction they provide.
But with so many suddenly homebound, the humble jigsaw puzzle can come to the rescue, providing hours of entertainment requiring no bandwidth and the simplest activation — opening the box and pulling out that first piece.
Best of all, once completed, with a few simple and inexpensive steps, it can be repurposed as a piece of decorative wall art for yourself or as a gift.
Kendra Nelson, 26, of Minnesota, is among 1,032 members of Facebook group Jigsaw Puzzle Lovers.
She’s been doing and gluing puzzles, about 40 to 50 to date, since she was 5 years old.
She’s given the majority away as gifts, but recently kept several to hang on her own wall.
“My Ma started buying me puzzles when I was like 5. … Whenever I would do puzzles, the pieces would get lost or eaten by random pets so I just learned to try and do puzzles in one day so I could glue them and not lose any pieces,” she said.
Through trial and error, Nelson said she discovered which glue worked best, first a brand sold by the Toys ’R Us chain, now Mega Puzzles’ SaveAPuzzle at Walmart.com is her choice.
She’s also experimented with what works best to put under the puzzle to catch the glue, choosing to carefully slide sheets of loose-leaf paper beneath the puzzle, which she prefers to the newspaper many glue bottle directions recommend.
“Instructions on the bottle say to lay down newspaper and then transfer the puzzle onto that but I usually only had one table so I still to this day just have loose leaf notebook paper,” she said. “And I pick up the corners of the puzzles and slide paper underneath all the way around the outside. And then I put one layer of the glue over the whole thing.
“It says to let it dry for at least an hour. I give it 24 hours every time because I really glob glue on sometimes. When it’s done drying, I pick up the puzzle and bend it into a ‘U’ a little bit to see where the weakest points are and re-glue those.
Then after it’s officially ‘done’ I flip it over and peel the paper off the back. It says you can glue the back, but I’ve had it seep through missed cracks and make the picture side of the puzzle weird, so I don’t mess around with that,” Nelson said.
A little Internet searching finds puzzle makers, from mainstream to niche artistic, providing helpful “how to” information on their websites.
Ceaco.com offers a do-it-yourself tutorial on gluing and mounting finished puzzles, including tips on vital workspace prep and set up, gluing, mounting, and framing.
For starters, cover your puzzle’s underlying work surface to prevent it from sticking while gluing, recommending wax or parchment paper as two best materials.
“If you hadn’t already placed a cover underneath your puzzle before you began, this can be tricky,” she said. “You may be able to shimmy the paper underneath without disturbing the puzzle. If not, find another large surface — such as a piece of cardboard — and temporarily slide the puzzle onto it while you place down a cover. This process is easier with two or more people.”
Next, brush off lint and dirt then flatten with rolling pin (or similar object).
To glue, Ceaco suggests “dedicated” craft glue i.e. Modge Podge or puzzle glue, a less costly and easier spreading formula combining adhesive with “a protective gloss finish which dries clear every time.”
Everyday household objects to facilitate glue application include a plastic paddle, piece of cardboard, business card, sponge, or brush.
Spread thoroughly but gently, taking care to seal the edges, and cover every piece. But applying too much glue can result in curled edges when dried. (If this happens, Ceaco recommends flipping the dried puzzle over then applying another glue coat to the back. Another solution is to cover and weigh it down flatly overnight.
Any air bubbles should disappear with drying, which, depending on your glue, can take up to five hours to “fully set and develop a seal.”
Before framing first mount the puzzle to a foam board, but know your frame’s dimensions and style first to know the proper sized board to select.
Next, transfer the puzzle from cover paper design side up on mounting board, carefully marking and measuring both to properly fit the intended frame.
Apply glue to the intended mounting spot on the board (not spreading out but evenly coating). Position the puzzle down, press gently, then apply several weighted objects and dry for 24 hours.
Soulduster.net, featuring four artists’ designs on a collection of art calendars, stationary, and home décor items, also highlights helpful décor centered hints at https://soulduster.net/diy-puzzle-framing/:
• Frame: “Choose a frame style that matches your home décor to create a consistent look. We like to leave about 2 1/2 to 3 inches on each size as quiet space to help focus the eyes on the artwork. The actual size of the frame may be restricted though if you are going with readymade frames.”
• Protective cover: “We left ours uncovered. However, glass or a transparent plastic cover can protect the puzzle. You can select material that minimizes glare and offers UV protection.”
• Backer board and mat: “To keep the cost down, we use bristol boards as backer and mat. If you go with a regular mat, you can select the thickness and cut angle.”
• Color of backer board and mat: “Color is very personal. We like to lean on the dark size to draw the eyes to the colorful and intrigue artwork. This may be black, or a dark color selected from the puzzle to create a harmonious look.”
• Title/quote: “Including a title or quote is fun. Make sure to leave adequate space when selecting the frame.”
For more information, visit https://ceaco.com/, https://soulduster.net/, and https://www.facebook.com/groups/jigsawpuzzlelover/.