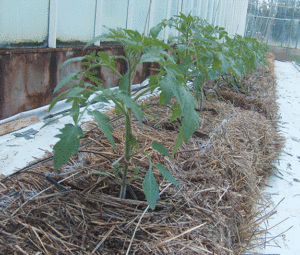
A straw bale garden can take the hassle of loosening and prepping the ground of a permanent garden, and allow you to easily grow something where sun conditions are ideal but perhaps the ground and soil are not. (Photo courtesy Wikimedia)
With the sunshine and bearable temperatures hanging around a bit longer and for multiple days, it’s time to rid your yard of traces of the crazy and wet winter as well as get your gardening projects started.
With some progressive (and easy!) gardening techniques, you can accomplish both tasks.
Whether you choose to try bales of straw or hay or do what’s known as hugelkultur, both methods harness composting power, self irrigation and minimal work for you.
Bale Gardening
Hay bales or straw bales are one of the most popular forms of alternative growing and though you may not think it, are a form of container gardening as the bale acts as both the container and the soil.
The bales take the hassle of loosening and prepping the ground of a permanent garden, and allow you to easily grow something where sun conditions are ideal but perhaps the ground and soil are not.
Though straw bales are thought to be more favorable with less seeds in them and disease risk, hay bales have the advantage of holding in water better and will also leave you with a more nutrient rich compost for your next project after your bale garden is gone.
Regardless of type, the bales don’t even need to be in great shape — if you have some that have been exposed to the elements, you may be able to skip a step!
Leftover fall decorations or ones used to help to insulate buildings throughout the winter are likely saturated with rain, snow and more rain 10 times over, and will have already started to decompose.
If you start with a new bale, you’ll need to do a quick 10-day conditioning to give the decomposition process a little kick start.
Before starting the process, make sure the bale is in the spot you want to have your “garden” grow, as lugging a heavy, waterlogged bale is not an easy task.
Initially, focus on keeping your bale saturated with water, add nitrogen rich fertilizer around Day 5 and each day after, cutting back the amount for your last three days of treatment with the amount depending which fertilizer you choose to use.
If you choose to use seeds when you are ready to plant, put a thin layer of potting soil on top to help hold them in place from slipping down the bale or blowing off the top.
You will find that bale gardening will accommodate a variety of plants, from veggies to flowers and everything in between.
The bales last about a year before turning almost into their own compost, so skip the perennials.
Get creative and use a bale in a sunny spot to toss in some cheerful zinnias for quick flower bed, or line a row of a bales up for a mini garden and feel free to put multiple different veggies in the same bale.
This method is also great if you are renting your property but still want a bountiful garden, or maybe just have a heavy traveling schedule and want to try a smaller scale garden this year.
Hugelkultur
Hugelkultur, which means “hill culture” or “hill mound” in German, is an old form of untilled, raised garden beds that work fantastically if you have poor soil quality, dry conditions or compacted soil.
This is a more permanent style garden so you’ll want to keep that in mind when choosing your spot, and also consider protection from foraging chickens or other beasts.
After you find your spot, chop up and remove sod with a goal of each mound being around around 3-feet-by-6-feet.
With the many wind storms this year perhaps you have amassed a pile of wood, twigs and branches that you can use for layering and creating the bulk of your pile.
Nitrogen is a player in this style of gardening as well, and if you can find some rotten pieces of wood all the better as it won’t take as much nitrogen from your plants (and if it’s rotten enough, will even add some.)
On top of your wood base, place the sod with the root side up.
Your next layer needs to be nitrogen rich material.
Think kitchen scraps, manure, and other materials, sort of like in a compost pile, again being careful what you use for pet reasons.
Next comes soil, mulch, and planting seeds or plants as you would in a typical garden bed.
In the end, your creation will be about 3 feet high.
Going higher with more tree matter will help it self irrigate for longer periods of time, while a lower bed would still hold water quite well in drought conditions.
And remember, the mound will likely settle and shrink some over time.
Hugelkultar is a slightly more picky growing technique than straw bales and does best with herbs, potatoes, cucumbers, squash and berries.
The trick to both of these methods is in the decomposition.
For hugelkultur, as the years pass and your wood decomposes, it will create air pockets which help in water filtration and holding capacity and will let you skip tilling and keep growing strong.
For either method, it will help add a little heat to the inside of your garden so you also have an extended growing season.


