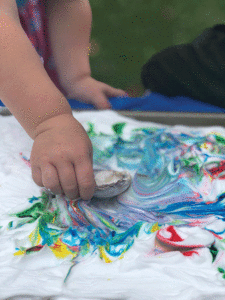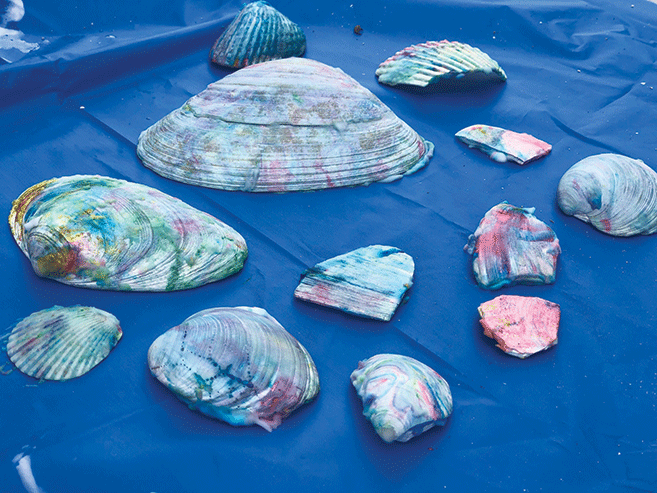
Seashell art with shaving cream is a quick and easy way for kids to decorate their beach treasures. Have the kids swirl — but not mix — the colors with a popsicle stick or toothpick. Next, dunk in your shells, dabbing the excess shaving cream with a paper towel. You can keep dipping until you are satisfied with the design, then allow to dry.
At the end of the summer, chances are, there are sandy seashells stuck in your beach bag, cubbies of your car and other inconspicuous places little hands may drop them.
Instead of setting your treasures aside, spend those last sweet days of summer making them into a souvenir that will take you back to the beach anytime you want.
Seashell Basics
For many crafts, you may need to drill a hole in your shell if it didn’t have one already. It’s easier than you think!
For a thinner shell, lightly tap a nail through the inside of the shell with the shell against a piece of scrap wood.
If the shell is thicker, use a drill and small bit.
While many crafts can involve tying, if you do need to attach shells, there’s a big variety of glues that can work. E600 is a bit smelly but great for projects that you really want to stick around (literally) for a while, like a mirror or decoration.
Tacky glue works for kid projects you can let set, or you can have them set up their project and then quickly assemble with hot glue to their specifications.
Of course, the best accent for shells is sand! (If you didn’t intentionally bring any home, check the floormats of your car for some.)
As sand holds moisture, spread it out on an old cookie sheet to dry it out.
The easiest way to incorporate it onto your project is using a thin layer of Modge Podge spread with a paintbrush, then gently pressing your sand into it.
You can also draw with tacky glue or school glue and then sprinkle finer sand on.
Picture frames are always a fun craft, especially for framing a beach picture from your trip.
They also make better gifts than those, “My loved ones went to the beach and all I got was this crummy magnet!”
Use an old frame you already have or grab a wooden crafting one at the store, being sure to remove the glass or plastic before you get decorating and spray it down with Krylon Crystal Clear or similar spray to seal if necessary.
If you have very over zealous collectors and a ton of shells, try filling up a small shadow box with them and sticking a photo in the front.
Wind Chimes with shells and beads of your choice strung on fishing line or twine are a fun, not too particular craft that doesn’t require a lot of attention to be beautiful but you will want to tie the shells in place so they don’t cover your beads.
For your base, a piece of driftwood or a larger shell are good options, but several things will fit the bill.
Mini chimes, with shells on a thicker material such as ribbon or twine for less tangling are also a pretty and personal ornament draped on a Christmas tree or a fun door accent.
For a fun activity with kids, try doing colorful shaving cream seashell art on light colored shells, similar to marbled Easter Eggs!
This is a picnic table or outside craft if possible, and having a bucket of water to dunk messy hands in is even better.
Squirt out a nice layer of shaving cream on a cookie sheet or tupperware container (1 can was more than enough), then add in small dots of different food coloring.
Have the kids swirl — but not mix — the colors with a popsicle stick or toothpick.
Next, dunk in your shells, dabbing the excess shaving cream with a paper towel.
You can keep dipping until you are satisfied with the design, then allow to dry.
Another great kid challenge is to make animals — real or imaginary!
Let them use any color paint they’d like, add glitter if you want and create three-dimensional or flat animals glued to cardstock or canvas.
Think critters like butterflies, jellyfish, mermaids, ladybugs, flamingoes, crabs.
These also make a great “Thank you” note if a friend or relative took them on a beach trip.
Have more seashells than energy to craft? Store them in a container until you are ready to get creative again.
They are a great staple that can turn up on a school project, in a fairy or dinosaur garden, etc.
Though care-free beach days may be coming to a close for now, but keep the summer vibes going with some seashell memories.


